
Introduction to DIY Engine Bay Wash
Washing your car’s engine bay might seem daunting, but it’s actually quite doable with the right approach. Think of it as giving your car’s heart and lungs a clean workspace to operate. Dirt, grease, and grime build up over time and can affect your engine’s performance. Not to mention, a clean engine bay makes any maintenance or repair work easier to manage, and it could potentially help in spotting any leaks or issues faster. Before diving in, remember, water and sensitive electronic components don’t mix well, so you’ll need to proceed with caution. But don’t worry, we’re here to guide you through the basics and help you get started on the right foot. Whether you’re a seasoned DIYer or new to the concept, cleaning your engine bay is a satisfying project that not only benefits your vehicle’s performance but also boosts its curb appeal.
Why Keeping Your Engine Bay Clean is Important
Keeping your engine bay clean is not just about making it look good when you pop the hood; it’s about keeping your car running smoothly. Dirt, grease, and debris can hide leaks, corrode parts, and lead to overheating by blocking air flow. A clean engine bay makes it easier to spot issues like fluid leaks or worn belts early, before they turn into bigger, more expensive problems. Plus, if you plan to sell your vehicle, a clean engine bay can make a great first impression, potentially increasing its value. It’s simple: a clean engine bay helps ensure your car stays healthy and performs at its best for longer.
Preparing Your Vehicle for an Engine Bay Wash
Before you start spraying water and soap all over your engine bay, take a moment to prep your vehicle properly. This will not only ensure a thorough clean but also protect your car’s vital components. First, ensure your engine is cool. Spraying water on a hot engine can cause damage. Next, disconnect the negative terminal of the battery. This is crucial to prevent any electrical short circuits. Cover sensitive areas like the alternator, distributor, and any exposed filters or electrical components with plastic bags and secure them with tape. This way, you’re safeguarding the parts that shouldn’t get wet. Finally, remove any large debris by hand or with a soft brush. Dirt and leaves can block water from draining out properly, leading to rust and other issues down the line. Once you’ve followed these steps, you’re ready to start the engine bay wash. Remember, the trick is not just doing it, but doing it right.
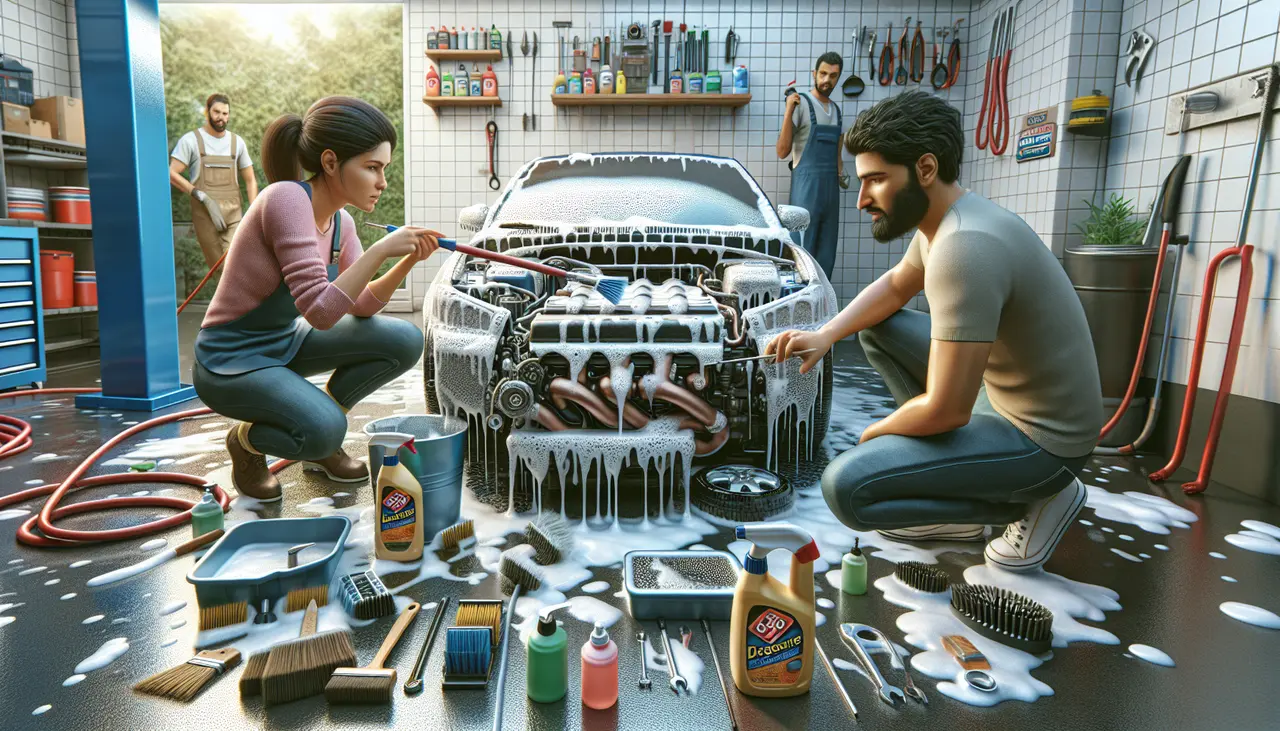
Tools and Materials Needed for Engine Bay Wash
Before diving into the world of DIY engine bay washes, make sure you have the right tools and materials at hand. It’s pretty straightforward, really. First off, you need a quality degreaser. This is the hero of the story that cuts through grease and grime. Next, grab some plastic bags or cling film – these are for covering electrical components and avoiding unwanted water drama. A set of brushes, from soft to stiff, will help you reach every nook and cranny, ensuring a thorough clean. Don’t forget a microfiber towel for drying and a standard garden hose for rinsing. Optionally, for extra shine and protection, consider a silicone-based protectant. That’s it – simple tools, big impact.
Step by Step Guide to Engine Bay Wash
First off, let the engine cool. You don’t want to be washing a hot engine. Next, disconnect the battery. Safety first. You’re dealing with water, after all. Cover up any sensitive electronics and the air intake. Use plastic bags. Simple. Now, you’re ready to degrease. Spray degreaser everywhere but don’t drench it. Let it sit but not dry. Then, scrub the tough spots. A toothbrush or paintbrush gets into those tight spots easily. Now, rinse. Use low pressure. You’re cleaning, not stripping paint. Everything’s wet, fine, but not soaked. Once you’ve rinsed, take off the covers. Dry everything. Compressed air works wonders for water in nooks and crannies. Finally, reconnect the battery, and you’re done. Not rocket science, just attention to detail.
Tips from the Pros for Effective Engine Bay Cleaning
When cleaning your engine bay, the devil’s in the details. Let’s get straight to the point with pro tips that make a big difference. First off, do not jump in without cooling your engine down. A hot engine and cold water don’t mix well—it can lead to damage. Secondly, cover electrical components like the battery, alternator, and fuse box with plastic bags. This step is crucial to prevent any short-circuiting. Now, onto cleaning. Opt for a mild degreaser over harsh chemicals. Harsh chemicals can harm engine parts while a mild degreaser gently lifts dirt and grease. Apply it, let it sit for a bit, but not too long—you don’t want it drying out. When rinsing, a low-pressure flow of water is your best friend. High pressure can force water into sensitive areas which could cause problems down the line. Lastly, let everything dry thoroughly before removing the protective coverings and starting the engine. This might seem like it’s slowing you down, but it’s all about protecting your ride. These steps, rooted in simple logic and attention to detail, will help ensure your engine bay cleaning is effective and safe.
Common Mistakes to Avoid During Engine Bay Wash
Avoiding water in sensitive areas is rule number one. It seems simple enough, but many dive straight in with a hose, hitting electronic components and risking damage. Cover electronics and air intakes before you start. Using the wrong cleaners comes next. Engine degreasers are your go-to, not dish soap or other random cleaners that can degrade rubber or plastic parts. Don’t scrub hard parts with abrasive tools either; you want to clean, not scratch. Skipping the engine cover because it looks clean is a rookie mistake. Dirt hides underneath, causing overheating. Lastly, not drying the engine bay thoroughly after washing invites rust and corrosion. A quick wipe-down and letting the engine run for a few minutes to evaporate moisture is a pro move. Stick to these tips to keep your engine bay clean and functional.
How to Dry and Protect Your Engine Bay After Washing
After washing your engine bay, drying it completely is crucial before you start your vehicle. Water in the wrong places can cause issues. To dry it, first, remove excess water using a clean microfiber cloth. Gently dab and wipe surfaces without rubbing too hard to avoid scratches. Next, use compressed air or a leaf blower set on low; this helps remove water from nooks and crannies that a cloth can’t reach. Make sure to hold these devices at a safe distance to prevent damage. Now, let’s protect your engine bay. Applying a protective spray or coating helps shield parts from dirt and water. Focus on non-electrical parts and avoid spraying directly on wires or connectors. Silicone-based sprays are good options; they create a barrier against moisture and debris. Remember, a small amount goes a long way. Finally, reconnect any parts you disconnected before washing, double-checking to ensure everything is securely in place. Starting your car after these steps helps evaporate any remaining moisture. Regular maintenance like this not only keeps your engine bay looking good but also prevents potential problems down the line.
Maintenance Tips: Keeping Your Engine Bay in Top Condition
Keeping your engine bay in top condition isn’t just about making it look good, it’s about keeping your car running smoothly. Regular maintenance prevents grime and dirt from building up, which can cause your engine to work harder than it needs to. Here’s how you keep your engine bay shining and effective. First off, check your engine when it’s cool. You don’t want to cause any damage or hurt yourself. Next, remove any loose debris like leaves or twigs that can get stuck in the engine components. Use a simple brush or your hands. Getting rid of these bits is crucial. Keep an eye on your engine’s fluids. Engine oil, coolant, and brake fluid are the lifeblood of your engine’s performance. Check their levels and top them up if needed. This ensures everything runs smoothly. Wipe down surfaces with a microfiber cloth. This removes dust and small particles without scratching anything. Lastly, protect electrical components by covering them if you’re washing the engine bay. Water can cause serious damage, so this step is super important. Doing these simple tasks can make a big difference. You’re not just keeping your car looking fresh, you’re ensuring it performs well, saving you money in the long run on costly repairs. Keep at it, and you’ll notice the difference.
Summary and Final Thoughts on DIY Engine Bay Wash
Washing your engine bay is a great way to keep your car looking and running its best. But it’s not just about spraying water and soap around. There are right ways to do it to avoid damaging your car. Always remember to protect sensitive parts like electronic components and air intake before you start. Use mild soap and a gentle brush to scrub away the grime. Rinsing should be done carefully, avoiding direct high-pressure streams on sensitive areas. After washing, make sure everything is dry to prevent any electrical issues. Doing this once or twice a year can really make a difference. It’s a simple task that can save you money and keep your car in top condition. Just take your time, be thorough, and your engine bay will thank you.


Leave A Comment